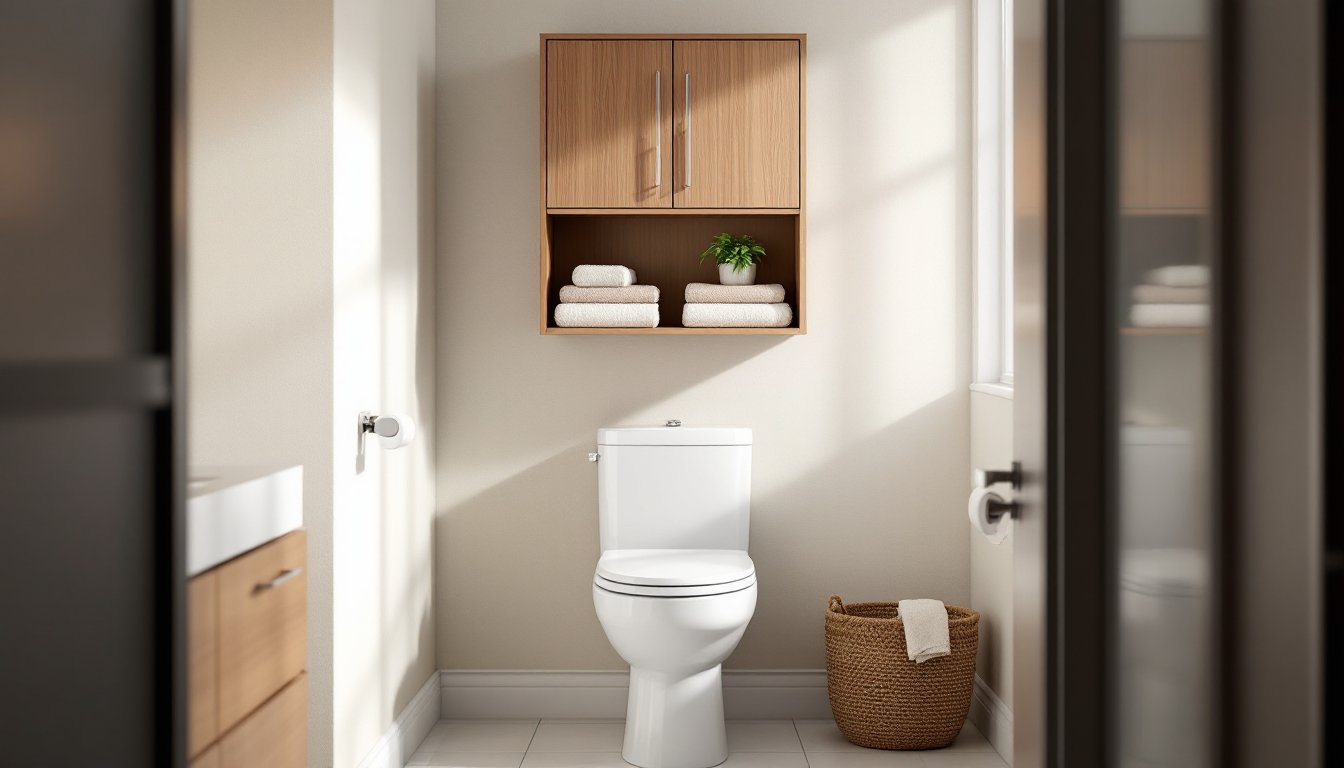
Bathroom space is precious real estate, and wasted vertical area above the toilet is a missed opportunity. Over the toilet storage has become a practical solution for homeowners looking to add organization without a major renovation. Home Depot offers a wide range of over the toilet storage options designed to fit different bathroom styles, budgets, and installation skill levels. Whether you’re dealing with a cramped powder room or simply want to declutter your master bath, these solutions can transform an unused corner into functional storage. This guide walks you through what Home Depot has in stock, how to pick the right unit, and how to install it like a pro.
Table of Contents
ToggleKey Takeaways
- Home Depot over the toilet storage transforms unused vertical space into functional organization without requiring permits or professional installation, making it ideal for cramped bathrooms.
- Choose between metal shelving ($60–$150), wooden cabinets ($120–$300+), or ladder shelves ($80–$200) based on your bathroom’s humidity level, décor style, and daily accessibility needs.
- Proper installation requires measuring clearance above the toilet tank (6–10 inches minimum), assembling the unit indoors, leveling it with shims, and optionally securing it with wall anchors for homes with children or pets.
- Metal units suit contemporary bathrooms and require minimal maintenance—just monthly dusting—while wooden cabinets need moisture-resistant finishes and periodic reapplication of waterproof topcoats every 2–3 years.
- Maximize the lifespan of your storage solution by using an exhaust fan during and after showers, checking wall anchors annually, and distributing weight evenly while staying within the manufacturer’s weight capacity of 50–150 pounds.
Why Over The Toilet Storage Matters for Modern Bathrooms
Most bathrooms lack storage. Between towels, cleaning supplies, personal hygiene products, and décor, clutter builds fast on limited countertop and cabinet space. Over the toilet storage solves this by claiming vertical real estate that would otherwise sit empty.
Installing an over the toilet unit doesn’t require a permit or professional contractor, it’s one of the most beginner-friendly storage projects a homeowner can tackle. Units sit above the toilet tank and typically weigh 15–40 pounds when loaded, so they’re stable without bolting to walls (though wall anchors are an option for extra security in homes with small children or pets).
The appeal is practical too. You gain 12–24 inches of height and 24–36 inches of width depending on the unit, creating space for rolled towels, guest supplies, or decorative baskets. Small bathrooms especially benefit: a narrow ladder shelf or corner cabinet can feel much less cramped than floor-based storage. Modern designs from Home Depot blend function with aesthetics, so your storage doesn’t look like an afterthought.
Top Home Depot Over The Toilet Storage Options
Home Depot stocks several categories of over the toilet storage, each with distinct trade-offs. Understanding what’s available helps narrow your choice.
Metal and Steel Shelving Units
Metal shelving is durable, affordable, and minimalist. Most units from Home Depot are constructed from steel or wrought iron with adjustable shelves (usually 2–4 tiers). They range from $60–$150, making them budget-friendly.
These units suit contemporary and industrial bathroom styles. They’re lightweight, typically 15–25 pounds empty, and assembly takes 20–30 minutes with basic tools (usually just a wrench or hex key). Shelves are open, so items are visible: this works well if you store rolled towels or decorative baskets. One downside: dust and moisture can collect on open shelves more easily than in enclosed cabinets, especially in high-humidity bathrooms. Wipe shelves monthly to prevent buildup.
Measure your bathroom ceiling height before ordering. Most metal units run 24–27 inches tall, leaving about 6–10 inches of clearance above the toilet tank. Confirm your toilet’s tank height (typically 28–32 inches from floor to lid) to ensure the unit clears comfortably.
Wooden Storage Cabinets and Towers
Wooden cabinets add warmth and visual appeal. Home Depot carries solid wood and engineered wood options ranging from $120–$300+. Common styles include rustic, farmhouse, and mid-century modern.
Enclosed cabinets hide clutter and protect contents from humidity better than open shelves. Most feature one or two cabinet doors and interior shelves, often with adjustable heights. Dimensions vary, but expect widths of 24–30 inches and heights of 25–32 inches.
Wood requires care in bathrooms. The biggest concern is moisture damage. Bathroom humidity can warp plywood or MDF over time, especially around the toilet where splashing occurs. Look for units with a polyurethane or water-resistant finish. If you choose solid wood, ensure it’s been properly sealed. Avoid unfinished wood unless you’re comfortable applying a waterproof topcoat yourself (polyurethane or semi-gloss paint works well). Assembly typically requires 45–60 minutes and often needs two people to steady tall units.
Space-Saving Ladder and Ladder Shelf Designs
Ladder-style shelves are trendy and space-efficient. These tall, narrow units (usually 12–16 inches wide) fit snugly over the toilet and alongside sinks or in corners. Prices run $80–$200 depending on material (bamboo, wood, or metal) and quality.
Ladder shelves work best in smaller bathrooms where a wider cabinet would feel cramped. They’re usually lighter (10–18 pounds) and quickest to assemble. Open shelving means easy access, though items must be neatly arranged, a basket on each rung keeps supplies organized. Bamboo options are moisture-resistant and eco-friendly, making them ideal for humid climates. Assembly typically takes 15–20 minutes with just a screwdriver.
How to Choose the Right Unit for Your Bathroom
Selecting the best over the toilet storage depends on three factors: space, style, and maintenance tolerance.
Measure your toilet first. Note the tank height (measure from floor to the top of the lid), width of the tank, and distance from the back of the toilet to the wall behind it. You’ll need at least 6–10 inches of clearance above the tank. Width is less critical, units typically overhang the tank slightly, but ensure nothing blocks your ability to sit.
Consider your bathroom’s humidity level. If your bathroom has good ventilation (a working exhaust fan running during showers), open shelving is fine. In a small bathroom without a vent, or where the toilet sits in a corner prone to condensation, opt for an enclosed cabinet with a water-resistant finish. Bathrooms with high humidity should avoid untreated wood.
Match your décor. Are you going for industrial edge, farmhouse cozy, or minimalist modern? Metal shelving complements industrial and contemporary spaces. Wooden cabinets suit traditional, rustic, and farmhouse styles. Ladder shelves work with bohemian, Scandinavian, and modern aesthetics. This matters because an ill-fitting unit will look like clutter itself.
Factor in access. If you use your over the toilet storage daily, open shelves mean faster access. If it’s for guest towels or seasonal supplies, an enclosed cabinet keeps everything hidden and dust-free. Think about what you’ll store: rolled towels stack beautifully on open shelves, while cleaning products are better hidden behind cabinet doors.
Budget realistically. Metal shelving is most affordable ($60–$150). Wooden cabinets mid-range ($120–$300). High-end options or custom finishes run $300+. Factor in any tools you might need (stud finder, wall anchors, shims) if your wall isn’t plumb, maybe another $20–$40.
Installation Tips and Best Practices
Most Home Depot over the toilet storage units are designed to sit on the toilet tank without fastening. But, secure installation matters, especially in homes with kids, pets, or older bathrooms where the floor might not be level.
Step 1: Prep the area. Turn off the bathroom exhaust fan and close the door to let the room acclimate, don’t install in a steamy bathroom. Wipe the toilet tank top with a dry cloth to remove dust and moisture. If your floor isn’t level (check with a 2-foot level), shims beneath the unit’s feet will stabilize it. This is critical: a tilted unit looks wrong and may shift over time.
Step 2: Assemble the unit indoors. Build it completely in a dry space, your bedroom or garage, before bringing it into the bathroom. Follow the manufacturer’s instructions precisely. Use a level during assembly to confirm shelves are plumb. If shelves are crooked, the unit will look unprofessional.
Step 3: Carry and position carefully. If your unit is tall (over 24 inches) or heavy, get a second person. Guide it over the toilet tank, centering it so it sits 2–3 inches away from the wall behind the toilet (this prevents rubbing and allows air circulation to reduce moisture damage). Position it so the centerline aligns with the toilet’s centerline for balanced appearance.
Step 4: Level and shim. Place a 2-foot level on the unit’s shelves. If it rocks, insert shims beneath the feet until it sits firmly. Tighten any leveling feet (if equipped) by hand, don’t over-tighten, which can crack plastic feet.
Step 5: Add wall anchors (optional but recommended). If your bathroom is humid or you have young children, consider attaching the unit to the wall behind it using heavy-duty toggle bolts or molly bolts. Locate wall studs with a stud finder: if a stud aligns with the unit’s attachment points, use ¼-inch lag bolts into the stud (1½ inches deep). Drill pilot holes to prevent splitting wood framing. If no stud is available, toggle bolts rated for 50+ pounds per anchor work in drywall. Install at least two anchors, one on each side of the unit’s upper frame.
Safety note: Wear safety glasses when drilling, especially overhead. Use a dust mask if your drywall is old: asbestos was used in some older drywall and spackling. If you suspect asbestos, stop and consult a professional.
Step 6: Final checks. Don’t load the unit immediately. Let any water-based finishes cure for 24 hours. Test stability by gently pushing the unit from different angles, it shouldn’t rock or shift. When loading, distribute weight evenly across shelves to prevent tipping. Most Home Depot units are rated for 50–150 pounds total capacity: check your manual and don’t exceed it.
Common mistakes: not measuring ceiling clearance (hitting the ceiling when tilting the unit into place), skipping the level step (shelves look crooked), and overloading one shelf. Take time with the level, and your installation will last years without issue.
Maintenance and Long-Term Care
Over the toilet storage requires minimal maintenance if you’re smart about it.
For metal shelving: Wipe shelves monthly with a dry microfiber cloth to prevent dust buildup. In very humid bathrooms, check for rust spots after 6–12 months, especially near the floor where condensation pools. If you spot rust, sand lightly with fine-grit sandpaper and apply a touch-up coat of metal paint or rust-inhibiting spray.
For wooden cabinets: Use a slightly damp cloth (not soaking wet) for cleaning. Wipe dry immediately. Reapply water-resistant topcoat every 2–3 years if you notice finish wearing near the toilet. Avoid placing items directly against the back wall: air circulation reduces moisture damage.
For all units: Check wall anchors annually if you installed them, tighten if they’ve loosened. Reorganize contents seasonally to spot any moisture damage early. Many bathroom storage failures stem from moisture, not design flaws. Good ventilation (using an exhaust fan during and 20 minutes after showers) extends the life of any unit significantly.
Bathroom storage doesn’t have to be complicated. Following best practices and learning from smart neighbors who’ve done this before saves headaches. Practical bathroom storage solutions, including over-the-toilet cabinets and shelving options, are well-documented online. For more ideas on decluttering, bathroom organization hacks highlighting over-the-toilet storage units provide additional inspiration. If you’re working in a small space and want broader décor guidance, small space living ideas and budget-friendly makeovers offer fresh perspectives on bathroom design.